Red White & Polka Dots
4:20 PM
Hello Everyone!
I wanted to share this quick and easy nail art idea for 4th of July.
It took me less than 20 minutes if that.
What you will need:
Base coat/strengthening polish - Sally Hase nail growth - Target
Top Coat - Seche Vite - Sally Beauty Supply
Red, white & blue polish (The ones of your choice).
Dotting tools (You can also use a bobby pin). - Sally Beauty Supply
Cotton balls & Q-Tips
Acetone
Start with clean nails. I added a coat of my nail strengthener to work as a strengthener but also as a base coat so that my nails are as even as possible, it makes the best canvas for nail art.
the look I'm going for needs clean nails so that you don't have other polish colors on it to distract from the design.
I stared with the stripes.
The easiest way to get the stripes is to move your hand at the same time you move the brush.
Make sure you use a thin nail art brush to make the lines as clean as possible.
Do the lines quickly so that you don't drag the brush to much. I found that when I did that the lines came out thicker or just messy.
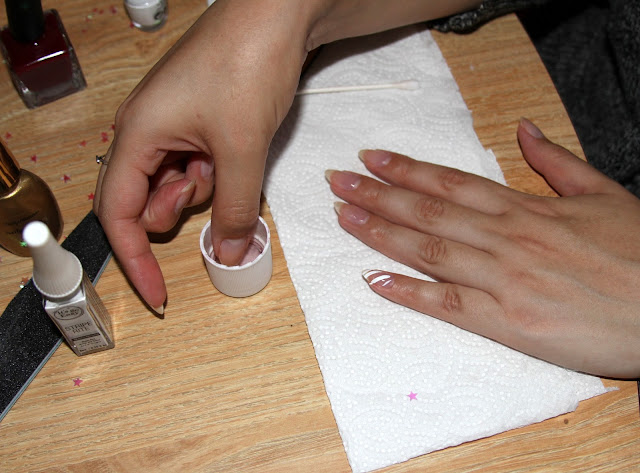
One of my biggest tips for doing your nails is to do your thumb last. As you see I'm dipping my thumb nail in to acetone so that I can use it to clean up my nails.
After dipping it a bit in the acetone take your nails and wipe around the edges of your nail.
I've seen the ladies at the nail salon clean my nails this way, I just add a little acetone to make it easier to wipe off.
Moving on from the stripes add the colors you will be using for your design on to a piece of cardboard. For the purpose of showing you what I do I added all the colors at the same time to the cardboard but when you are doing yours do them one at a time. They tend to dry quickly on to the cardboard.
After you have added all the colors you will be using, grab your dotting tool.
Remember if you don't have these a bobby pin will do just fine. I like the dotting tool because you can get different sizes.
I dab the polish on and sometimes do a dot on the cardboard to make sure I don't have too much polish. If you dip it to much you will get a sloppy dot on your nail.
Start adding your polka dots!
Do this slowly do that the tool you are using doesn't slide around and mess up your design.
Add as many dots as you would like. In the pattern you want.
For my middle finger I wanted to include all three colors. So towards the bottom I started with red, then added the white and finished off with the blue.
Add all the dots in the colors you want. I finished off my thumb nail with just white polka dots. I really like how they look just in white.
Grab your top coat.
Make sure you let your design dry.
Although with this design I didn't find that it took long to dry. Remember I didn't add a nail polish under the polka dots so it's less polish to dry.
Again cleaning up the edges with my thumb nail.
I think this turned out cute, simple and it was so easy. You don't have to use the red, white and blue you can do them all one color or mix and match. It's a lot of fun.
I hope this was easy to follow. Please let me know what you think.
Have a great 4th of July weekend!


0 comments